Tuesday, December 13, 2011

Winter-time Entertainment

Chicago is certainly much warmer at this time of year than I'm used to on the Canadian prairies, it's not exactly play outside weather most of the time soooooo, we've been trying to find fun ways to stay happy and entertained in our apartment without cluttering it with too many toys, spending too much money, or forgoing our damage deposit ;). Here are a few of the things we've tried out:

Making things with boxes: 
I found this link on Pintrest to ikat bag's collection of DIY box creations for kids. We decided to make a box kitchen out of some of the many boxes that are floating about here from all of my online holiday shopping.

Art . . . in the shower:
We've added food colouring to both baby shampoo a shaving cream for painting. Benjamin's also a big fan of his bath crayons.
 
Sensory Play:
The number one sensory activity in our house is playing in water. I always get help with dishes, cleaning, and Booper would happily take 10 showers or baths a day :) I've got a tub of rice that we play in when I'm feeling especially patient, but cloud dough is a huge hit in our house, as is playing with dried beans (and they're really very easy to clean up). Booper loves pretending to cook too so I'll sometimes pull out oatmeal, flour, spice jars with spices or Ovaltine in them, along with measuring cups, spoons, and bowls and let him make a gigantic mess.


Fine Motor Fun:

I'm super cheap so I scoured the recycle bin for containers that could be used to push or sort items into. Here's what we came up with :)


Friday, November 4, 2011

What a Halloween!!!!

Booper loves the lions at the zoo and has perfected the cutest "roar" ever so I decided to make him this adorable lion costume from McCall's. Unfortunately, after sewing all of those ribbons on, he decided that the head piece was pure evil and refused to wear it (thank goodness for more mature cousins who will happily wear them instead, making one toddler's mother feel much better about the blood, sweat, and tears invested). This, however, left us costume-less only a week or so before Halloween. Oh dear!

I was working on adult costumes in the meantime:

Owls for my sister-in-law and myself. I found this on the Livvy Loo Who blog; a knock off of a Pottery Barn owl costume that I then made a knock-off of for us.


And an octopus for my brother-in-law inspired by this picture I found on Flickr

I have to say, hoodie costumes are the way to go!!! All you have to do is trace a hood from your wardrobe (and I followed the instructions from Indietutes on how to make a Basic Hooded Cloak for the owl) and off you go!

Anyway, while reading 10 Trick-or-Treaters a few nights before Halloween, Booper declared that he was going to be the orange spider in the book, so . . . that night I made him an orange spider costume inspired by the octopus.


Turns out, of course, that we didn't end up celebrating Halloween at all since we flew home to Chicago that night (and he didn't particularly like wearing this costume either) but it was certainly fun making all the costumes AND we should all be set for next year :)

Toddler hooded towel

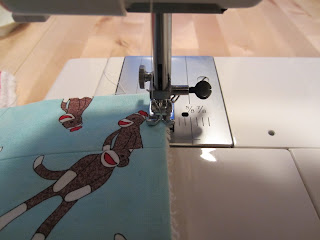
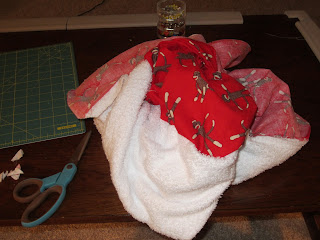
Booper recieved something like seven baby towels as gifts when he was born, each wonderful and cozy in their own ways. He has grown out of all but two, and our favorite, by far, is one by Dwell Studios. Not only is it a substantially sized towel but the hood juts off from the center of a rectangle as opposed to being in the corner of a square, which makes the wrappability of the towel great! Unfortunately, said towel costs $52.00 and I, being a true Winnipeger by now, am FAR too cheap to shell that out ;) Soooo, I decided to figure out how to make them myself. I ordered the terry cloth and sock monkey material from fabric.com (why can't we have an online fabric store like this in Canada?!?!?) and took two evenings to make 3 fabulous towels for the little monkey cousins (Owie, Ya-ya-ya, and Boopie himself). Here's how it went:

1. Cut the cloth. I got a yard of each colour of cloth and cut it at 29 inches.

 2. Cut the long, thin piece into 4 equal sections (I promise this will make sense in a minute)


3. Right sides together, pin (and then sew) 2 of each of the pieces together along one of the long sides. Iron seams flat.

4. Make a pattern piece for the hood. This is what mine looked like- I just traced the hood from his other hooded towel, or you could use a hooded jacket etc. 
4a. With right sides of the already-sewn pieces together, pin and cut out two hood piece. (Cut out two hood pieces from the terry cloth as well)

5. Pin and sew hood pieces along curved edge (with right sides together, of course).


6. Cut a piece of terry cloth the same size as your big piece of outer cloth and then pin with right sides together. Sew along 3 of the 4 sides, leaving one long side open.


7. Iron sewn hood piece, right side out. Place it, facing the right side of the terry-cloth hood piece, and pin around the outer hood (as shown). Sew together.

8. Flip hood right-side out and iron flat.
8a. Sew two layers together, as close to the edge as possible, to keep the hood's shape well.

9. Place the hood, terry-cloth towards terry cloth, and outer-fabric towards outer-fabric, inside the open side of the main part of the towel. Pin closed, leaving a foot or so on one of the sides open.
9a. Sew the side closed, leaving the gap open to turn the towel right-way out through.
10. Turn the towel right-side out and iron flat. Fold the material from the gap together and pin in place.

11. Sew all the way around the outside of the towel to help it keep its shape.
Ta, da! You're done!!!!

Geepers, I hope that made sense. It ended up being much more difficult to explain than I had anticipate :)